How to Upload Files and Manage Errors
Uploading files to your case is a straightforward process. Follow this guide to ensure all documents are added successfully and errors are resolved efficiently.
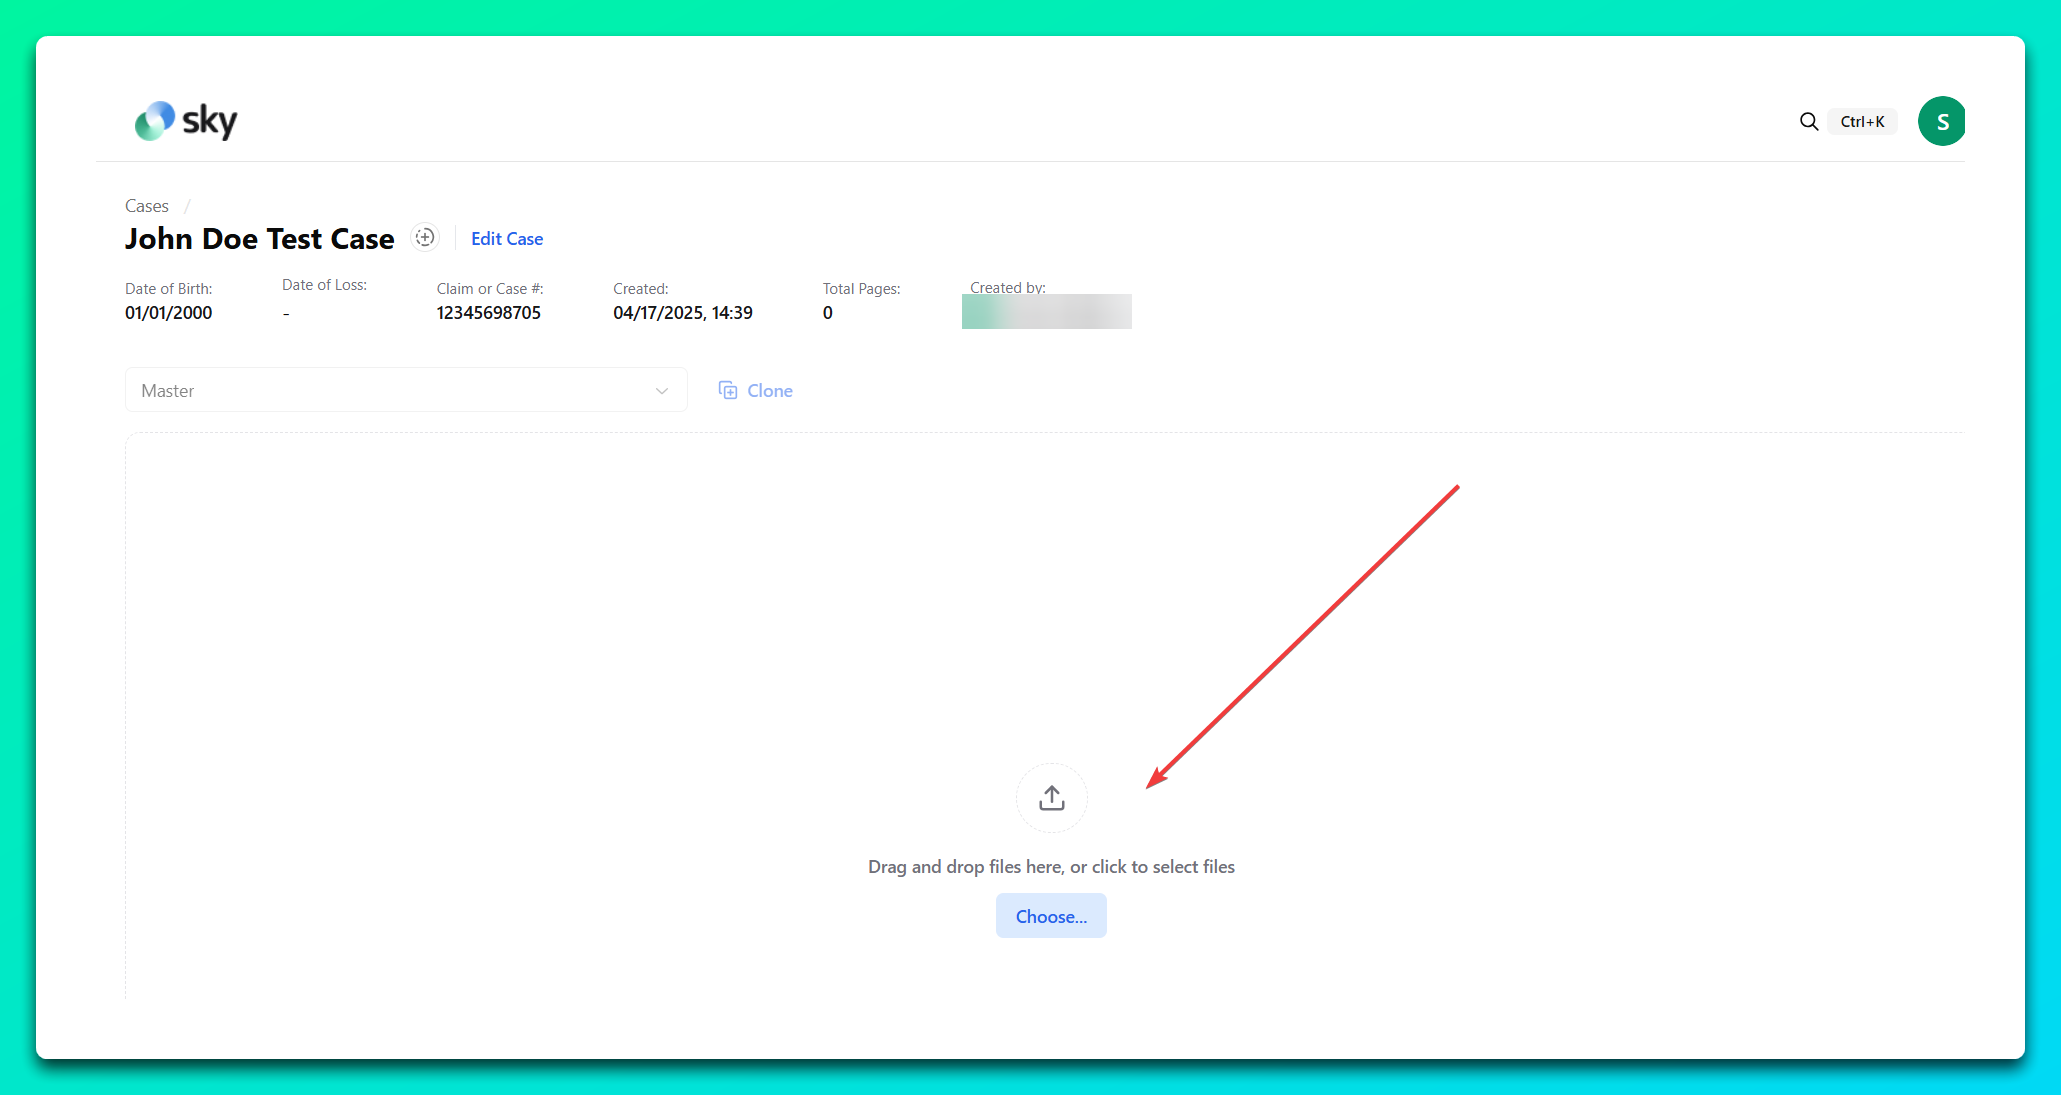
Step 1: Open the Case
Navigate to the Cases section and select the case you want to upload files to.
Step 2: Upload Files
Drag and drop files into the designated upload area, or click the Choose... button to select files from your device.
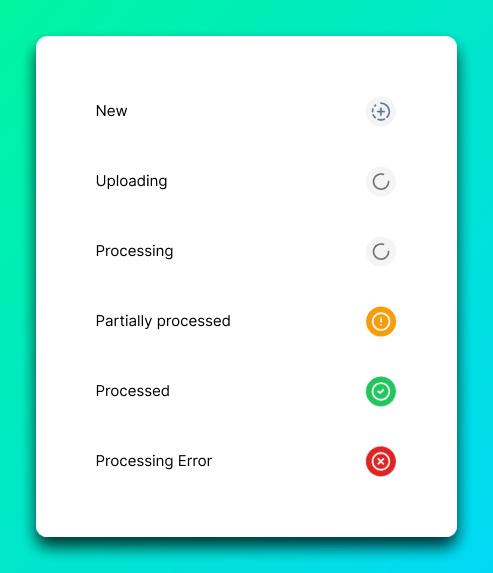
Uploaded files will display their progress with statuses like Uploading, Processing, and Processed.
Step 3: Monitor the Upload
Watch the status of each file as it transitions through the upload process.
If an upload is successful, the status will change to Processed.

Below is a list of the different document processing statuses:
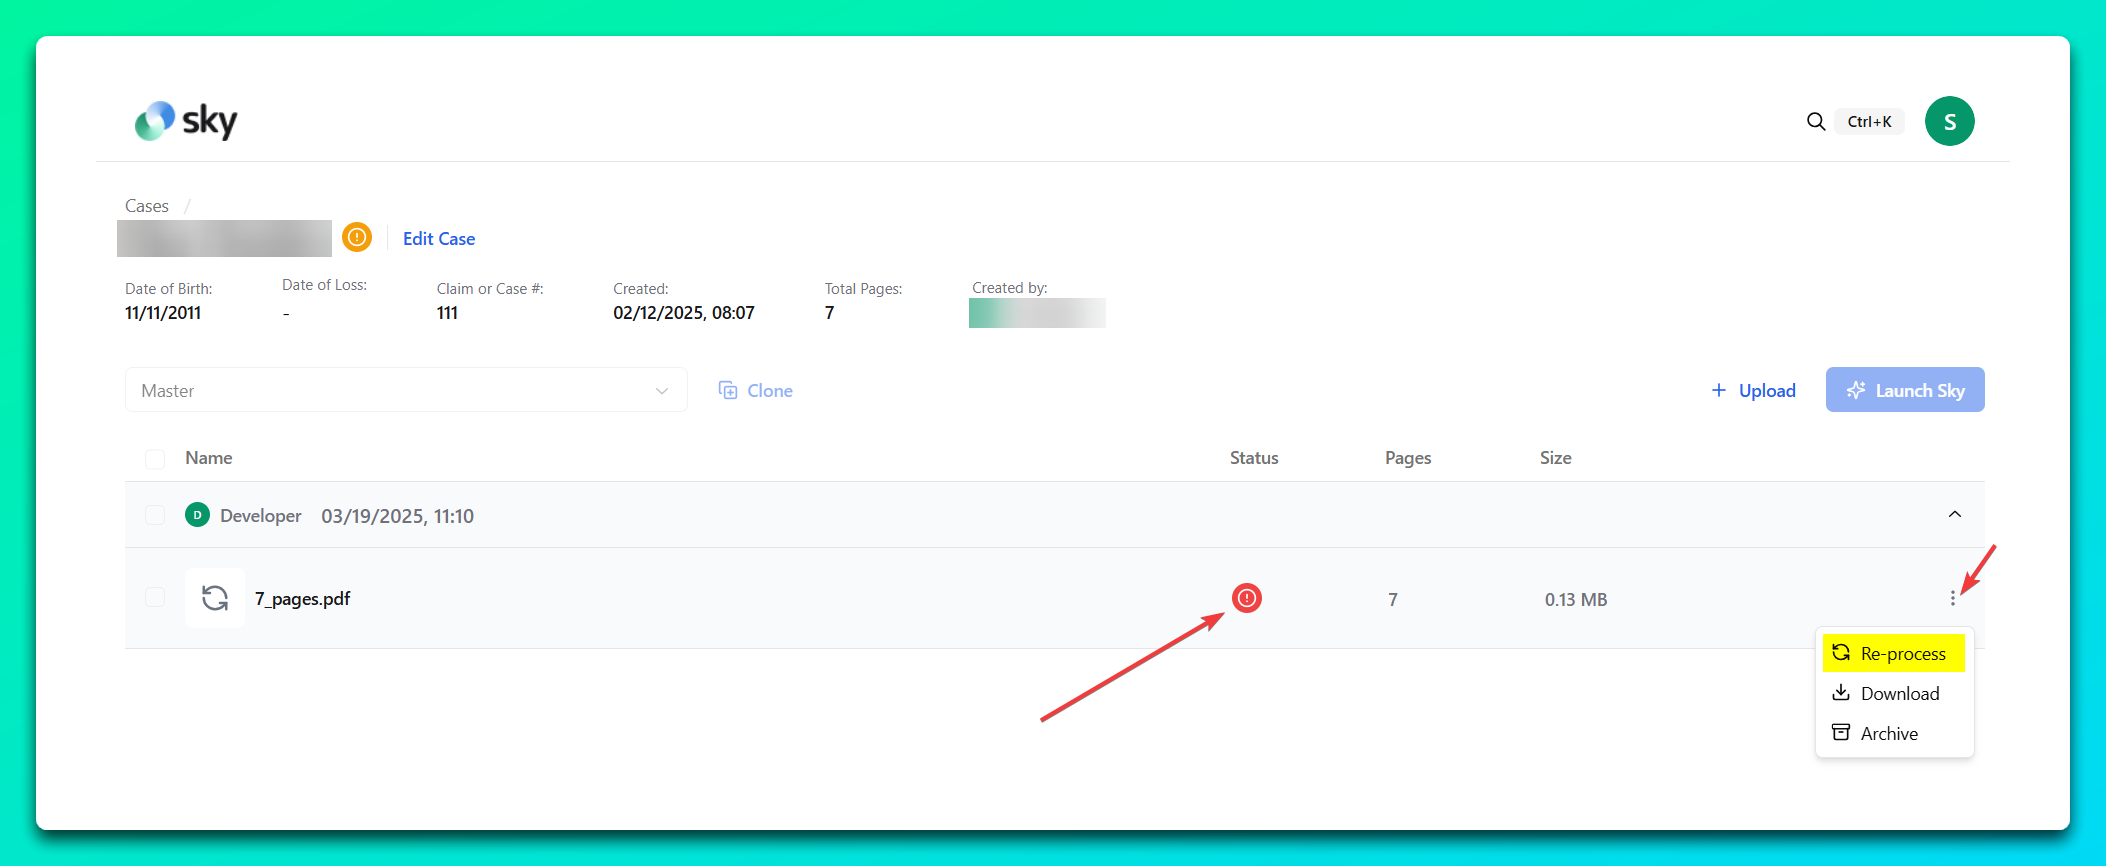
Step 4: Handle Errors (If Any)
If a file fails to upload, an error message will appear. Common errors include:
- Uploading error, try again: This may be due to a network issue. Check your connection and retry the upload.
- File size is too big: Compress the file or select a smaller file to upload.
Step 5: Retry Failed Uploads
Click Re-Process next to the error message to reinitiate the upload. Ensure the file's status changes to Processed to confirm success.
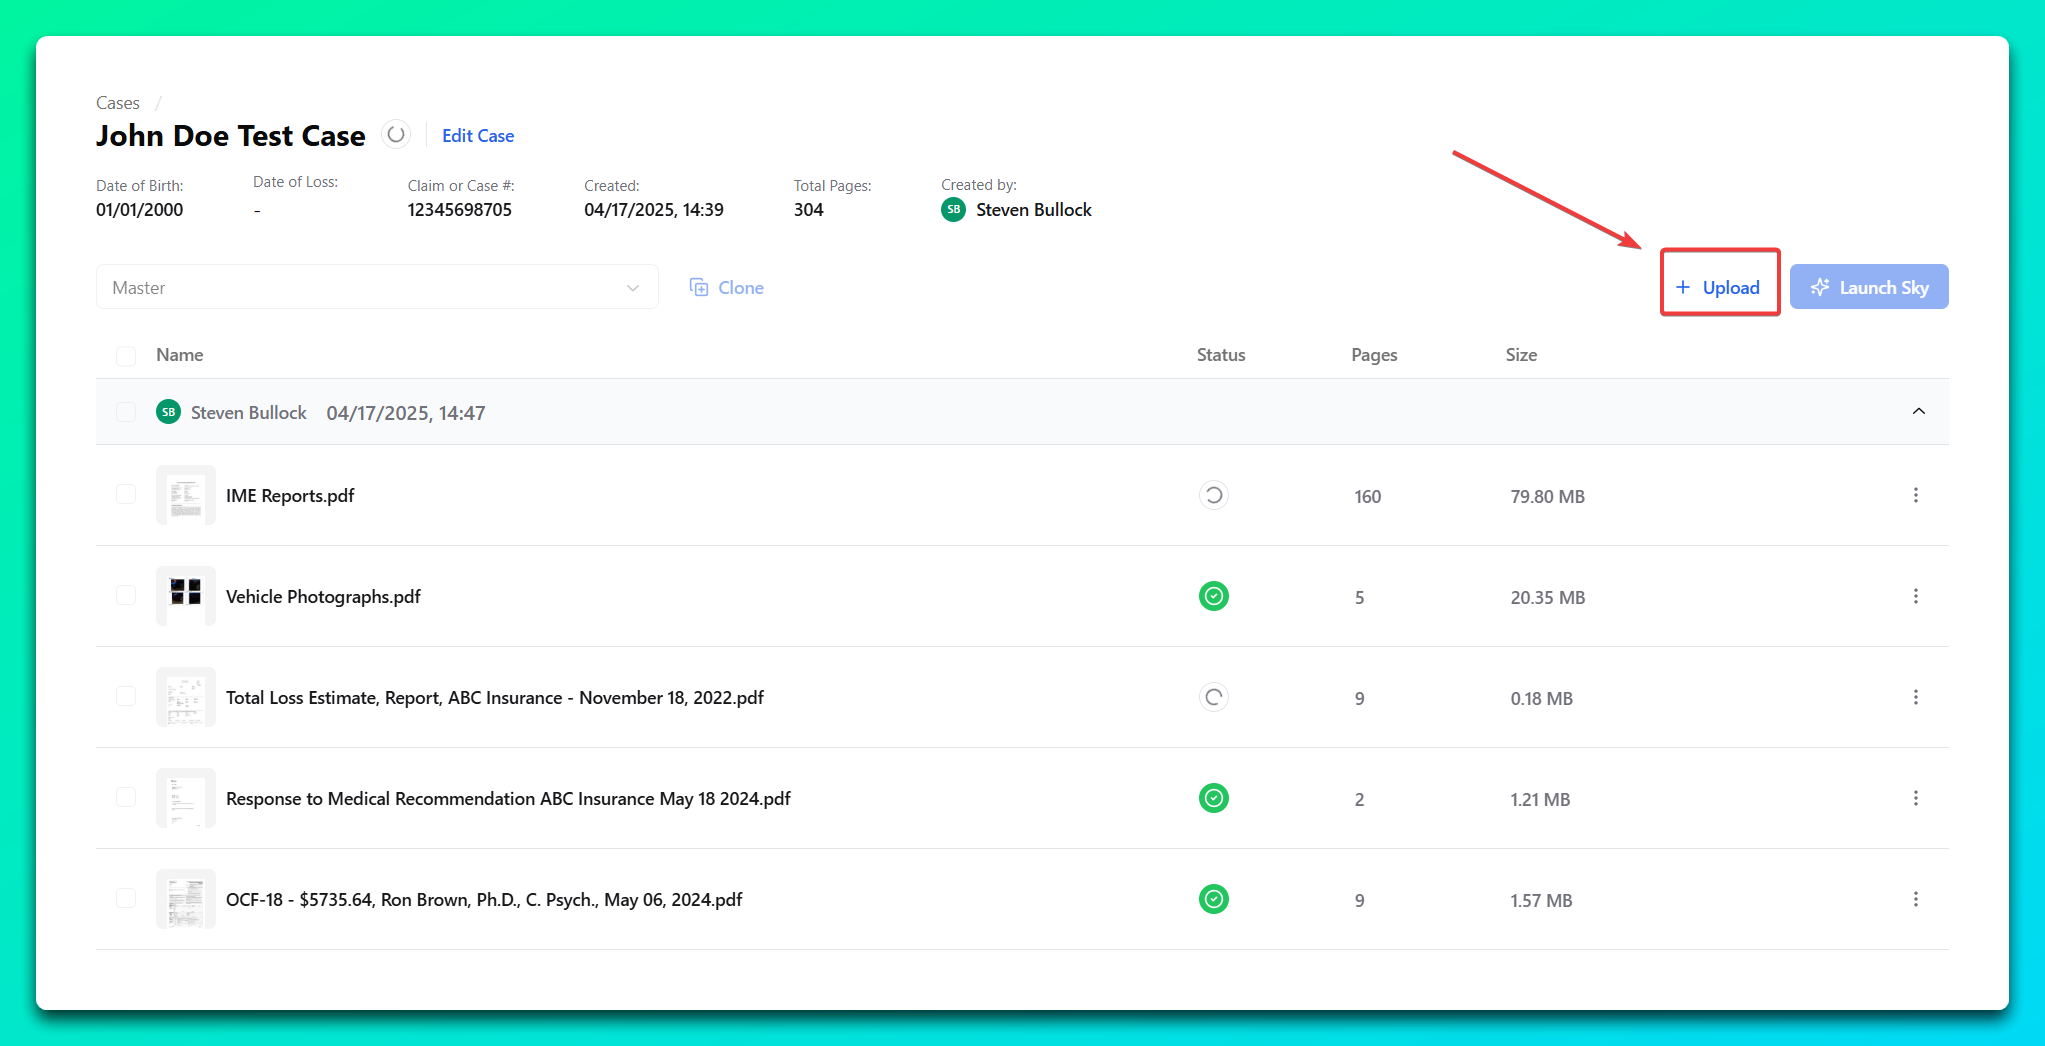
Step 6: Upload More Files (Optional)
If additional documents are needed, repeat the upload process by dragging and dropping or clicking Upload button.
By following these steps, you can ensure all required files are successfully uploaded to your case. For any unresolved issues, contact support for assistance.